Sometimes we burn videos to DVD for backup purpose or for sharing. But when we need to do the burning work, we just find that it’s confused to burn DVD. Reasons either for the video files are not compatible with the native DVD burner (iDVD for Mac and Windows DVD Maker for Windows), or the completed files cannot be played with our DVD player. Sometimes even MP4, the most compatible format to programs and devices, cannot be imported to them.
For the most of time, MP4 is compatible with iDVD on Mac, but MP4 is actually a container just like AVI, and MKV. And if the format inside MP4 container is not compatible with iDVD, then you cannot burn MP4 to DVD with iDVD. Here’s a surely work solution for you to burn MP4 to DVD Mac, that is, to use iOrgSoft MP4 to DVD Burner Mac to help you.
This MP4 to DVD converter Mac supplies you the fast speed and best quality of the DVD burning on Mac with outputting the two major system of DVD: NTSC and PAL, which make sure you can play your finished DVD disc on DVD player. The usage is really easy and I will show you step by step in the following passage. Learn it with the detailed introduction:
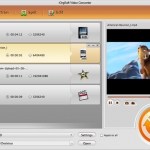
Step 1.Import videos to DVD Maker
After you free download the burner with the link a bove and have it installed, you should add your MP4 movie to the program, clicking the “+” icon or “File” button on top-left corner. You can add several files at a time if the DVD storage permitted.
Tip: if you want to remove unwanted files, you can choose it and click the “-” option besides “+”.
Step 2. Setting
You can find a processing line on the bottom of the software, and beside it, there’s an alternative button with “DVD5/DVD9”. Both of the options mean the time limit of your DVD disc, one for 120min, another for 240min. Next to them, there’s an eye icon for previewing. Again next to it, it’s “Burn” button for you to set the output file (ISO/DVD), DVD Aspect Ratio (4:3/16:9), DVD Format (NTSC/PAL).
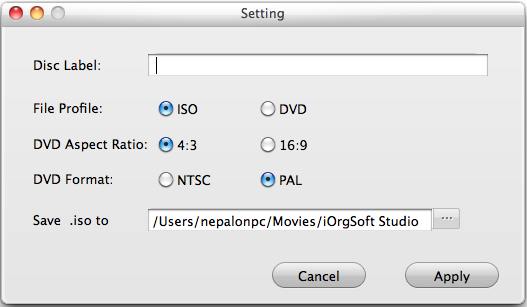
Tip: ISO file is the ready file for burning, if you choose this to output, you don’t need to insert a DVD disc, and meanwhile, you may name the ISO file in “Disc Label” and set the output path in “Save .iso to”.
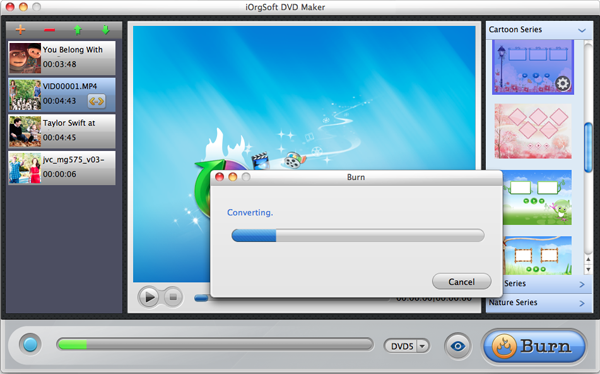
Step 3. Fast burn MP4 to DVD
When setting finishes, you should click “Apply” in the “Setting” window and the burning will begin at once. Remember to insert a blank DVD disc to the DVD-ROM for burning. Then wait for some time and you can play back the videos on your DVD player..
Optional reading:
In fact, the catchier function of this DVD burner is to create your own DVD menu with customized background image, music, and title (words), as well as the button icon. You may do all of these editing with the Customize DVD Menu panel:
Note: the small icon in the right side of the adding files is for trimming, that is, to cut the unwanted period of the videos as you like.