When you shoot some footages and unfortunately they are in MOV format, though holds the same file extension with iMovie MOV and QuickTime MOV, yet is different from them. And so if you want to burn MOV to DVD for storage, troubles will embrace you. I mean if you want to burn your MOV file to DVD with iDVD on Mac, you may fail to do so as the compatibility problem.
The easiest way to solve it is either to convert MOV to iDVD, then import videos to iDVD for smoothly burning, or use a third-party DVD burning software to convert MOV to DVD directly.
For the first solution, you should need iOrgSoft Mac Video Converter to help you convert videos to any format you need. The simple usage are as follow:
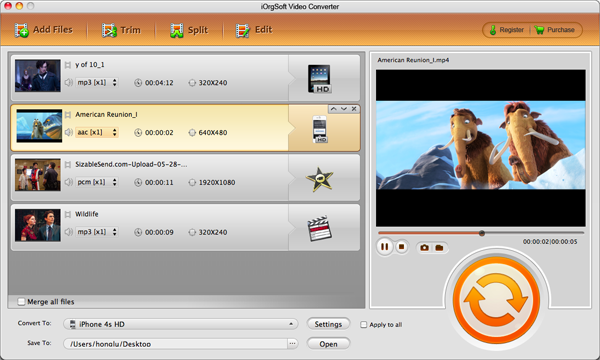
Step 1. Add MOV files to the converter on Mac
When you download, install, and launch it, you will see the main interface. And to add files, you can just click “Add File” button on the top-left corner, then you can select the files that you want in the pop-up windows. Batch converting is available.
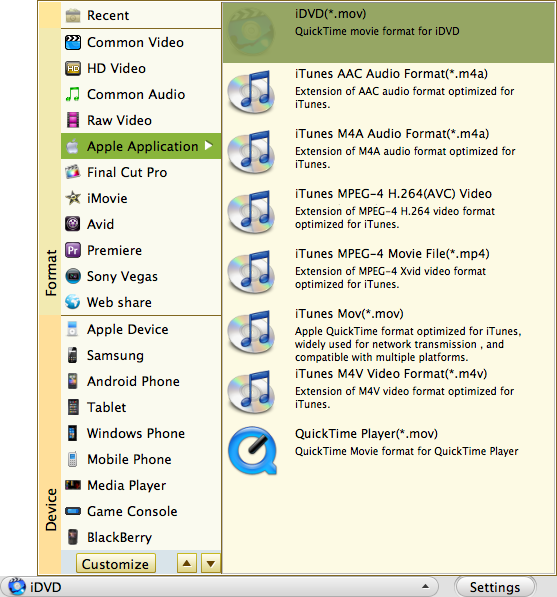
Step 2. Select output format as iDVD
After importing, you should find the exact output format with the route of “Convert to” bar->”Apple Application”->”iDVD(*.mov)”.
Step 3. Convert MOV to iDVD
When all parameters are ready, you can just hit the “Convert” button on the right of software, i.e. the big round button. Then the conversion will be start automatically. Find the output files with hitting the “Open” icon besides “Convert” option, on the left.
For the second solution, You can make use of a MOV to DVD Burner Mac to directly burn MOV to DVD. The burner also allows you to save the videos into an ISO file so that you can burn the ready file to DVD directly when you have the disc. As to the usage of it, you can refer to the specific steps below:
Step 4. Import MOV to the DVD burner on Mac
Again you should download, install, and launch it. Then you can see the main interface like below:
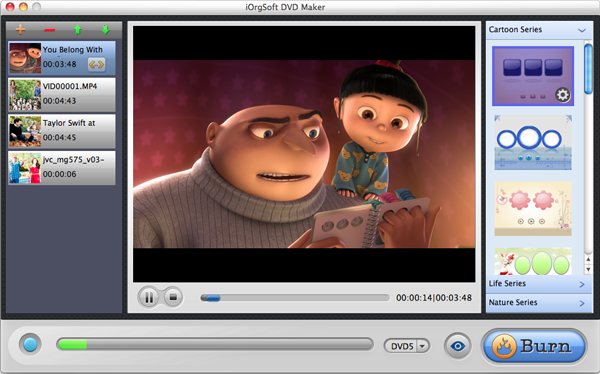
Can you see the “+” icon on top left? Click it and you can choose the videos you want, only need to take the whole duration of your importing files as there’s a storage limitation for one DVD disc. And according to the capacity of your DVD disc, you can choose “DVD5” or “DVD9”, which means “120min/240min”, on the bottom besides the procession line.
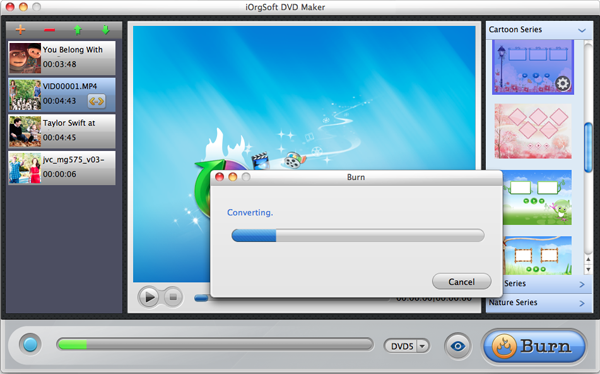
Setting and start to burn MOV to DVD Mac
Actually if you don’t want to customize the DVD menu, this can be the last step. Click the “Burn” icon and you’ll see a “Setting” window for you to choose set the output file (ISO/DVD), DVD Aspect Ratio (4:3/16:9), DVD Format (NTSC/PAL). After setting, click “Apply” and the burning will be start and burning automatically. Remember to insert a blank DVD disc to the DVD-ROM before burning.
Optional reading: