“I want to burn my iMovie videos to DVD, but I don’t know what to use would be better, can you give some suggestions to me? I’m using Mac OS X 10.6. ”
Sometimes you just got the same problem of burning iMovie videos to DVD with this guest. You may have the native DVD Maker of Macbook, the iDVD, but it can be a little bit complicated or the output format may cause troubles for playing back on DVD player. If you don’t want to bother so much, maybe you should take a third-party software into consideration, an iMovie to DVD burner.
iOrgSoft iMovie to DVD Burner Mac would be the optimized choice for you to burn not merely iMovie movies, but all videos to DVD with ease. Also, it can be the best DVD menu Creator as it allows you to DIY the DVD menu with your personal pictures, music, words to be the background. The usage is quite easy, and in the following passage I will show you every single usage of the burner and tell you how to export iMovie to DVD.
Tip: if you want to burn videos to DVD on Windows PC, you can just make use of the Windows version-iMovie to DVD Burner
Step 1.Add iMovie videos to DVD Maker
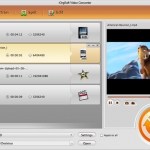
When you finish downloading and install the iMovie to DVD burner Mac, you can import your iMovie MOV files to the software with clicking the “+” icon on top-left corner. You are allowed to import several videos within the limitation storage of your DVD disc.
Tip: if there’s any unwanted files, the “-” option besides “+” can help you remove them.
Step 2.Customize the DVD menu
You can do all the customizing work with the Customize DVD Menu panel, first choose one of your favourite template, then click the tool icon on the template, and you can see the “Background”, “Menu Title”, “Button”, “Frame” options there for you to DIY the background image, music, and title, backward/forward/play button as well as the frame of every videos.

Step 3.Set the specific parameters with your favor
In this step, first you may find an alternative button with “DVD5/DVD9”. It means 120min/240min according to the time storage of your DVD disc, select it due to your disc rather than the videos you want to burn. Next to it is an eye icon, and you can preview all the effects of customizing. Next to it, the “Burn” button allows you to set the output file (ISO/DVD), DVD Aspect Ratio (4:3/16:9), DVD Format (NTSC/PAL).
Tip: If you don’t have a DVD disc at hand, you’d better to save the ready videos to an ISO file. When you have the DVD disc, you can directly burn the ISO file to DVD without the second time editing. You can name the ISO file in “Disc Label” and set the output path in “Save .iso to”.
Step 4.Create DVD from iMovie
When everything is ready, you need to click “Apply” in the “Setting” window, then the burning will be start and burning automatically. Don’t forget to insert a blank DVD disc to the DVD-ROM before apply burning.
Tip: if you want to cut the unwanted period of the videos, see the small icon in the right side of the adding files? It is for trimming and you can cut the unwanted period with this function.